Magento 2 Installation
There are several ways to install and manage the Magento 2 extension. Depending on your setup you can install via composer, manually, or using magento connect. We highly recommend using the composer method for the best results with the least issues. If you are unable to use the composer method, using magento connect would be a better route than a manual install. We encourage everyone to avoid manual installation with Magento 2. In many cases, performing a manual install can have unintended consequences for your store. If you cannot install with magento connect or composer, feel free to reach out to our team who can help get you up and running.
Download
Github: Main || Queue.
Magento Connect: Springbot
Quick Find
Install
Install using ComposerInstall using Magento Connect
Install Manually
Update
Update using ComposerUpdate using Magento Connect
Update Manually
Uninstall
Uninstall using ComposerUninstall using Magento Connect
Uninstall Manually
Install
Installing the springbot extension can be done several ways. In this section we will walk you through using magento connect, composer, or manually installing. To complete the install phase you will need a springbot account, access to your magento admin panel, and access like SSH for running console commands on your server.
Install with Composer (preferred method)
- Open a console window for your server. (Generally this is done via an ssh connection.)
- In the console window, navigate to your root magento directory. NOTE: On most systems your magento files will be under 'var/www/html/'. if you aren't sure or the folder is empty, contact your hosting provider to ask what your default web directory is.
- Next, simply execute the following commands in order.
- These commands will download both extensions using composer, enable both extensions, run the magento setup wizard, then re-cache, re-index, and re-deploy any static files for your store. NOTE: If your store is running in production mode or you know compilation is enabled in the configuration, you will need to re-compile by using the following command.
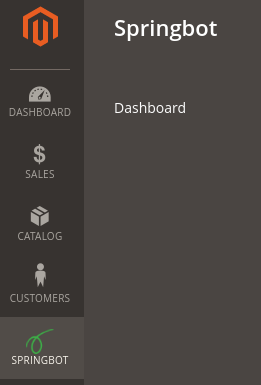
- Once you have executed all of the commands you should now see a springbot menu in your admin panel. Click this link then select Dashboard.
- On this page, simply enter your springbot credentials and log in.
- Once you see the syncing image, everything is complete.

Install with Magento Connect
- To install using the magento connect method, please navigate to our Magento 2 Extension on the Magento Marketplace.
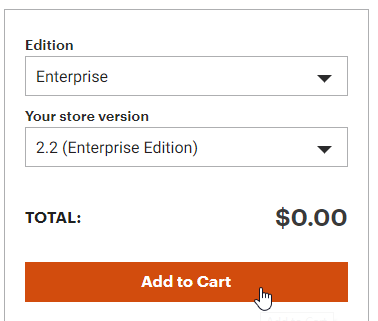
- From the drop-down on the right, choose your magento edition and version. (we are compatible with almost every version of magento currently available)
- Click "add to cart"
- At the top of the page select the cart icon and click "Proceed to Checkout"
- You will not be charged for our plugins so simply click "place order" and you will be directed to a page with an install button.
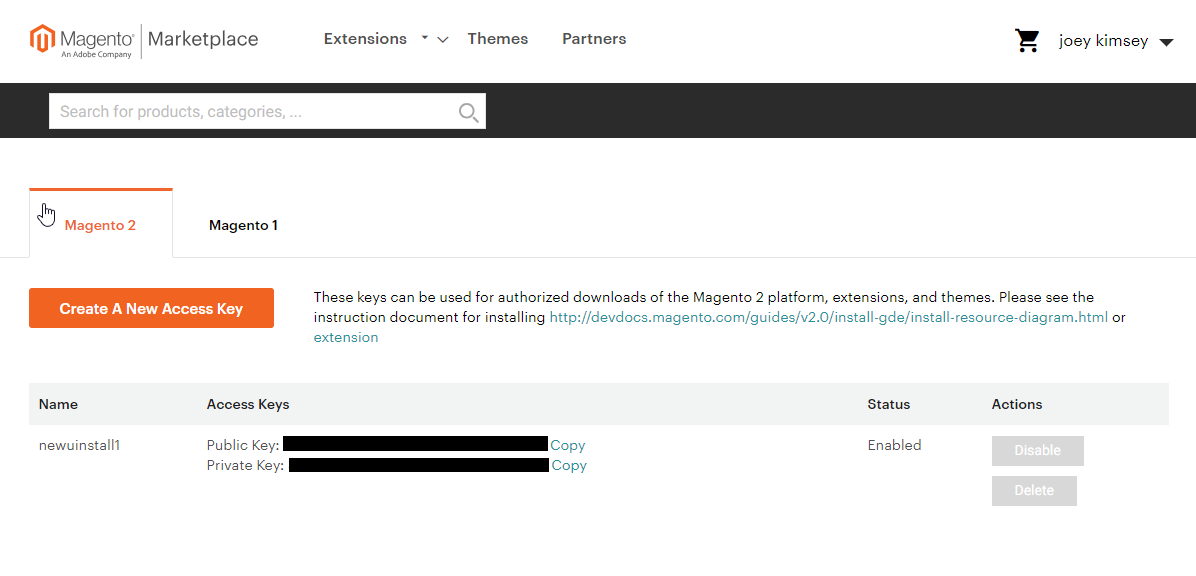
- The install button will lead you to a page that lists two access keys.
- log in to the magento admin panel
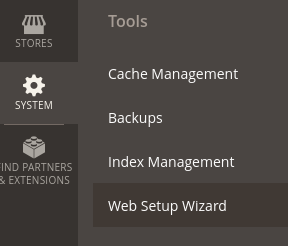
- In the Magento admin menu, navigate to System -> Web Setup Wizard (under the tools section)
- You may see a screen requesting you to login with a public/private key. Use the credentials from the magento marketplace page we left open in the previous step.
- Click extension manager
- On this page select "review and install" in the middle.
- The extensions list can be pretty long so you may need to increase the number of results or click through the pages until you see "springbot/magento2-plugin" in the list. Select the version you want and select install. (the most up to date version is selected by default)
- You should now see a page for installing springbot, simply click readiness check to confirm everything is working before the install.
- Once the readiness check completes, you are presented with options to backup your files and configurations. It is higly recommended that you make a backup in case anything goes wrong. NOTE: Depending on the size of your store, this process can take anywhere from minutes to hours.
- On the next screen simply click install to begin the process.
- This process can take several minutes but once it completes you should be presented with a success page
- You should now see a springbot menu in your admin panel. Click this link then select Dashboard.
- On this page, simply enter your springbot credentials and log in.
- Once you see the syncing image, everything is complete.
Install Manually
We highly recommend against installing manually whenever possible. We understand that many times this is how an install must be completed, but we strongly encourage everyone to use the composer method outlined above.
- First you will need download the latest extensions from github. (make sure you download both magento2-plugin and magento2-queue)
- Unzip the folder(s) and place all plugin files in a folder titled Main and all queue files in a folder titled Queue NOTE: The names are Case-Sensitive, ensure the folder you create has a capital for the first letter.
- Open a sftp/ftp connection to your server.
- If your magento app/ directory doesn't already have a code folder, create one now.
- Next, under app/code/ create another new folder named Springbot NOTE: The name is Case-Sensitive, ensure the folder you create has a capital "S" for the first letter.
- Copy the "Main" and "Queue" folders to app/code/Springbot/
- Next, open a console window for your server. (Generally this is done via an ssh connection.)
- In the console window, navigate to your root magento directory. NOTE: On most systems your magento files will be under 'var/www/html/'. if you aren't sure or the folder is empty, contact your hosting provider to ask what your default web directory is.
- Next, simply execute the following commands in order.
- These commands will enable the plugins, run the magento setup wizard, deploy any static pages or scripts, re-cache, and re-index your store. NOTE: If your store is running in production mode or you know compilation is enabled in the configuration, you may need to re-compile by using the following command.
- Once you have executed all of the commands you should now see a springbot menu in your admin panel. Click this link then select Dashboard.
- On this page, simply enter your springbot credentials and log in.
- Once you see the syncing image, everything is complete.
Update
The Springbot team is always working on improvements and new features for our customers. Sometimes you will need to update your extension to properly utilize these new features. This section focuses on how to update your plugin to the latest version we offer.
Update with Composer (preferred method)
- Open a console window for your server. (Generally this is done via an ssh connection.)
- In the console window, navigate to your root magento directory. NOTE: On most systems your magento files will be under 'var/www/html/'. if you aren't sure or the folder is empty, contact your hosting provider to ask what your default web directory is.
- Depending on your setup, you may need to define what version you would like to update to.
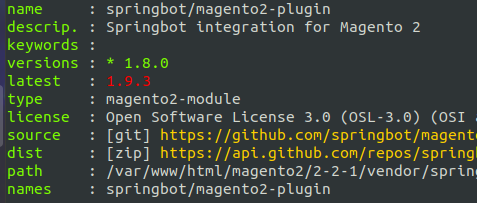
- You can run the 'outdated' command to find out what your version is set as.
- It should print something like this:
- For this example, our version is set to 1.8, This means that even when we run the update command, you won't download a new version. NOTE: If you see versions : * dev-master Then you can continue to the next step without having to run the composer require command.
- To fix this, you simply run the following command to set your version as dev-master (This means whatever the latest version is, you will update to that version)
- Next, simply execute the following commands in order.
- These commands will download any updates using composer, run the magento setup wizard, then re-cache, and re-index your store. NOTE: If your store is running in production mode or you know compilation is enabled in the configuration, you may need to re-compile by using the following command.
With an update, you shouldn't need to log in again or make any other changes to your configuration.
Back to TopUpdate with Magento Connect
- log in to the magento admin panel
- In the Magento admin menu, navigate to System -> Web Setup Wizard (under the tools section)
- Click extension manager
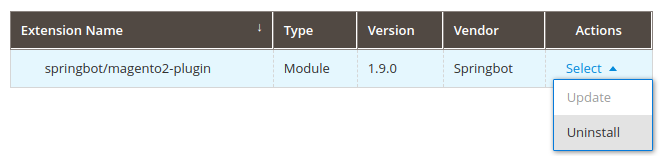
- On this page you should see a list of all your installed extensions. look for the springbot extension and select update from the drop down menu on the right
- You should now be on a page titled Update springbot/magento2-plugin, click Start Readiness Check
- Once the readiness check completes, you are presented with options to backup your files and configurations. It is highly recommended that you make a backup in case anything goes wrong. NOTE: Depending on the size of your store, this process can take anywhere from minutes to hours.
- On step 3, simply click update.
- This process can take several minutes but once it completes you should be presented with a success page.
NOTE: You may see a screen requesting you to login with a public/private key. If you're not sure what your credentials for this page are, please see our guide on obtaining magento 2 marketplace credentials.


With an update, you shouldn't need to log in again or make any other changes to your configuration.
Update Manually
We highly recommend against updating manually whenever possible. We understand that many times this is how an install must be completed, but we strongly encourage everyone to use the composer method outlined above.
This process assumes you have completed your initial install using our manual installation method outlined on this page. If you find that something isn't right or you do not see the files mentioned in this guide, please don't continue and reach out to us for assistance.
- First you will need download the updated extensions from github.
- Unzip the folder(s) and place all plugin files in a folder titled Main and all queue files in a folder titled Queue NOTE: The names are Case-Sensitive, ensure the folder you create has a capital for the first letter.
- Open a sftp/ftp connection to your server.
- Copy the "Main" and/or "Queue" folders to app/code/Springbot/ (depending one which plugins you are updating you may need one or both) NOTE: You will have to override the current files. This is completely normal in the update process.
- Next, open a console window for your server. (Generally this is done via an ssh connection.)
- In the console window, navigate to your root magento directory. NOTE: On most systems your magento files will be under 'var/www/html/'. if you aren't sure or the folder is empty, contact your hosting provider to ask what your default web directory is.
- Next, simply execute the following commands in order.
- These commands will run the magento setup wizard, deploy any static pages or scripts, re-cache, and re-index your store. NOTE: If your store is running in production mode or you know compilation is enabled in the configuration, you may need to re-compile by using the following command.
With an update, you shouldn't need to log in again or make any other changes to your configuration.
Back to TopUninstall
These instructions can be used to safely uninstall and remove the springbot extension from the magento admin panel.
Uninstall with Composer (preferred method)
- Open a console window for your server. (Generally this is done via an ssh connection.)
- In the console window, navigate to your root magento directory. NOTE: On most systems your magento files will be under 'var/www/html/'. if you aren't sure or the folder is empty, contact your hosting provider to ask what your default web directory is.
- Next, simply execute the following commands in order.
- These commands will disable both extensions, remove all springbot files and folders, then re-cache, re-index, and re-deploy any static files for your store.
Back to Top
Uninstall with Magento Connect
- log in to the magento admin panel
- In the Magento admin menu, navigate to System -> Web Setup Wizard (under the tools section)
- Click extension manager
- On this page you should see a list of all your installed extensions. look for the springbot extension and select uninstall from the drop down menu on the right
- You should now be on a page titled Uninstall springbot/magento2-plugin, click Start Readiness Check
- Now you are presented with options to backup your files and configurations. It is highly recommended that you make a backup in case anything goes wrong. NOTE: Depending on the size of your store, this process can take anywhere from minutes to hours.
- Springbot does not store any data so you can skip the "remove or keep data" step.
- On step 4, simply click uninstall.
- This process can take several minutes but once it completes you should be presented with a success page.
NOTE: You may see a screen requesting you to login with a public/private key. If you're not sure what your credentials for this page are, please see our guide on obtaining magento 2 marketplace credentials.
Uninstall Manually
You should only uninstall the extension manually if you original installed manually. This guide assumes you followed our previous instructions for installing manually. If you do not see the files it references or the directions don't make sense, we recommend using one of the other 2 methods to remove the extension. For this method, you will need SSH access to the server you have magento running on.
- Open a console window for your server. (Generally this is done via an ssh connection.)
- In the console window, navigate to your root magento directory. NOTE: On most systems your magento files will be under 'var/www/html/'. if you aren't sure or the folder is empty, contact your hosting provider to ask what your default web directory is.
- Next, simply execute the following commands in order.
- These commands will disable both extensions, remove all springbot files and folders, then re-cache, re-index, and re-deploy any static files for your store.
Back to Top